
Welcome to The Swatching Sprite's vanity table! Here, you'll find all of the non-nail related, beauty tid-bits
Sunday, March 17, 2013
Google Reader Going Away-Follow With Bloglovin!
Hey, everyone
I'm sure a lot of you have heard about the fiasco involving Google reader. Apparently, it will be going away within the next couple of months. :-( In order to continue keeping up with the blogs you follow, you may need to find a new avenue. I've now included an option to follow my blog through bloglovin. The button is on the right hand side of the main page of my blog. If you want to keep updated with my blog, go ahead and click! You'll get all updates from this blog just as you have. You can also search the name of either of my blogs (theswatchingsprite and sprites vanity) on the bloglovin site.
I hope you are all having a fantastic weekend! OH, and Happy St. Paddy's Day!

Friday, March 15, 2013
Jack Black Lip Balms (Vanilla & Lavender)

Ever since I first tried the Jack Black Balms, I have been hooked. I really do think they are the very best lip balm I have come across. For a long time I only used the Lemon & Chamomile. I have finally tried another "flavor." This one is the Vanilla & Lavender.

I know a lot of people love the one with mint, but I have sensitive lips and products with mint, camphor, or menthol ingredients cause me to have an allergic reaction. So, as you might have guessed, I'm hesitant to even attempt wearing the Jack Black Mint & Shea Butter lip balm. However, they have a decent amount of other flavors for me to work my way through. They have Shea Butter & Vitamin E, Mango & Mandarin, Black Tea & Blackberry, Grapefruit & Ginger, Lemon & Chamomile, Natural Mint & Shea Butter, and Vanilla & Lavender,
They are made with natural ingredients and are mixed with skin conditioners and antioxidants. They glide on so easily and have a cushy feel to them. I don't find them to be sticky and uncomfortable. I love the way they feel on the lips. Immediately after application my lips feel hydrated and soothed.

I have come to look at these balms as a must-have item in the winter. I keep one in my purse so I'm not without one while out. I have another in my lip product drawer for home use. If you haven't tried these, give one a go and I think you'll be converted too!
You can buy these online through several etailers. I've ordered mine through Apothica.com for $7.50. It does seem like a high dollar amount for a balm when you stop and think a single tube of Chapstick can be purchased for just around $1.00, but a little goes a long way and the ingredients are superior. The moisturizing Chapsticks do feel nice and protect, but the Jack Black Balms (I feel) help to heal my chapped lips plus protect and moisturize. And the flavors they come in smell very, very good.
Speaking of the scent. The Vanilla & Lavender is stronger on the lavender. This isn't a bad thing, for me. I don't pick up on much vanilla but since I enjoy the smell of lavender, I'm still a fan. It has a true straight-from-your-garden floral yet medicinal scent. Don't let me saying "medicinal" scare you off. If you have smelled a real lavender plant, it has a natural herbal smell to it. It's earthy and amazing.
All around, two thumbs up from me. If you struggle with chapped lips (any time of year), give these a whirl. Within a few days you'll see massive improvements.
Monday, March 11, 2013
DIY Drop Cloth Curtains

Admittedly, this has nothing to do with "beauty" but I was pleased with the turn out of one of my home projects so I thought I'd share. I decided to create some drop cloth curtains. This is nothing new, especially in the DIY home makeover blog circles. Every blogger I had seen do this had beautiful results and it is so cheap! To purchase this amount of fabric (especially in a length that would go from ceiling to floor) would cost you significantly more than it does if you use drop cloths. I mentioned to my mother in law, as well as my own parents, that I was going to create curtains from a drop cloth and I'm fairly certain I got some unusual looks (the conversations were over the phone).
If I remember correctly, I bought the larger sized drop cloth (9 ft x 12 ft). It comes in two panels sewn together. My plans were to rip the seam and use each panel to cover one window. They were large enough to do this and I like the look of one over-sized panel pulled to one side. <--if you have two windows in a room. One single window might look odd. But, two windows, each with the curtain pulled to the farthest outside edge, I think looks nice. Well, I didn't anticipate just how much these would shrink. I assumed I'd lose a few inches, but holy moly! I'll get to that in a minute....
So, I separated the two panels. A good thing about drop cloths is they already come with the edges finished. I took the panels and put them through a bleaching process. I didn't hate the color they come naturally, but the beige was a bit too dusty and just didn't look right with the coloring of the rest of my home furnishings. They ended up in 2 bleach baths. The first time I used 2 cups of bleach to a full washing machine filled with hot water. I let the washing machine agitate for about 2 minutes just to make sure the bleach was fully mixed in. Then, I turned it off and let it sit for about 4 - 4.5 hours. Then, I completed the wash cycle. I thought this might be enough, but upon drying, they were still a bit dark. Soooo, I did the whole bleach process again. However, the second time I used 2.5 cups of bleach and let it sit for about 7 hours. yup! I was happy with the color after that. So, I went ahead and washed with detergent and then dried them in my machine. I should have air dried them to prevent the amount of shrinkage, but I honestly didn't think I'd lose as much as I did. It shrunk down in width only to just over half its original size. WHAAAAAT?!
Somewhere in my stubborn mind I figured I could still use one panel per window, but cut it in half to create 2 smaller panels (yes, don't bother trying to follow the logic... it isn't there. You'd think I'd realize if I already lost width, it makes zero sense cutting that shortened panel in half again.... ) So... now I had four panels from one drop cloth. I stitched up all the raw edges, created the casing for the pole at the top and then it hit me that cutting each panel in half wasn't so brilliant. I tested two panels on a window and it looked far too stretched. There was no ruffling, which looked tacky. Soooo, I used all four panels on one window. That doesn't bother me so much because we've always used four store bought panels for larger windows to create extra ruffling.
What you see on the window is the four panels all together. I had a TON of length left, which I knew I'd have to cut away, but I didn't want to do that until I drilled up my curtain pole and could visually see how much needed to come off. I sat on the floor pinning where I wanted to hem. At this point, I pulled the curtains back down and stitched up the hem. Voila!
I chose to have these curtains start almost at the ceiling and come down just at the point of touching our baseboards. Well, I chose the ceiling and my husband chose the baseboard. I wanted them to almost touch the floor but my husband thought that would look strange visually cutting off a section of baseboard. He was unsure of hanging them so high. Sooo, compromise! I prefer the look of curtains hung high. It makes your ceilings look higher and I think there is something more elegant about it.
So, that's it. My drop cloth curtains that I'm very pleased with. I don't think anyone would ever guess they were made from drop cloths, had I not mentioned it. They look like expensive linen fabric. They're nice and thick, durable, let in lovely glowy light, yet offer complete privacy (if you don't have blinds behind them...which I do have.)
The only thing I would currently do to them is iron them a bit. You won't ever get all of the wrinkling out of them, that is just the nature of the fabric, but it would reduce some of them that I see. I'm not too bothered by it, though, because they have a sort of rustic elegance about them that I quite enjoy. I think I just might redo all of my curtains like this!
*side note: These didn't end up in the original room I had planned on. When the shrinkage and the needless panel cutting started, it forced me to take them to a room with one window. I'm going back to my original plan for the original set of windows...but now that I know the fabric is temperamental and prone to extreme shrinkage, I'll be better prepared. :-) These now live in my dining room.

 |
| Close up image of the fabric. You can see the mix of colors and the texture of the fabric here. |
 |
| Pretty ruffles! I just love 'em! |
UPDATE!!!!!!!!
So, I have finished the curtains. I now have my dining room and living room done with the drop cloth curtains. Though I have multiple windows, I'll just show you one from each.
 |
| sorry for the glare! I really should have photographed at night |
This is the original window from the beginning of this project. (dining room) In the day, I pull the curtains to either side (2 panels to each tie). I fussed a lot with what I was going to use to tie back the panels. I started by cutting and sewing strips from the scrap fabric but I didn't care for the look. Even though they are drop cloth, they have ruffles! They need something lovely. I had some white lace ribbon in my craft stuff so I cut strips, heat sealed the ends, and voila! Dainty, but simple, ties.

I was able to still do the single panel for the living room like I wanted. However, instead of pulling it completely to one side and letting it just hang straight down, I went with a draped tie. I felt that this would mesh with the look of the curtains in the dining room. Though tied in a different fashion, it is still tied with the same fabric, the curtain is the same fabric, and the point at which it is tied is high up like in the dining room.
I'm sitting here looking at the photos, and it really does them no justice. In person they look so nice. They have a laid back feel yet have an air of grace and personality. Yes, I know...they're just curtains. Whatever, I love 'em!
Wednesday, February 6, 2013
Neutrogena Ultra Sheer Dry-Touch Sunblock
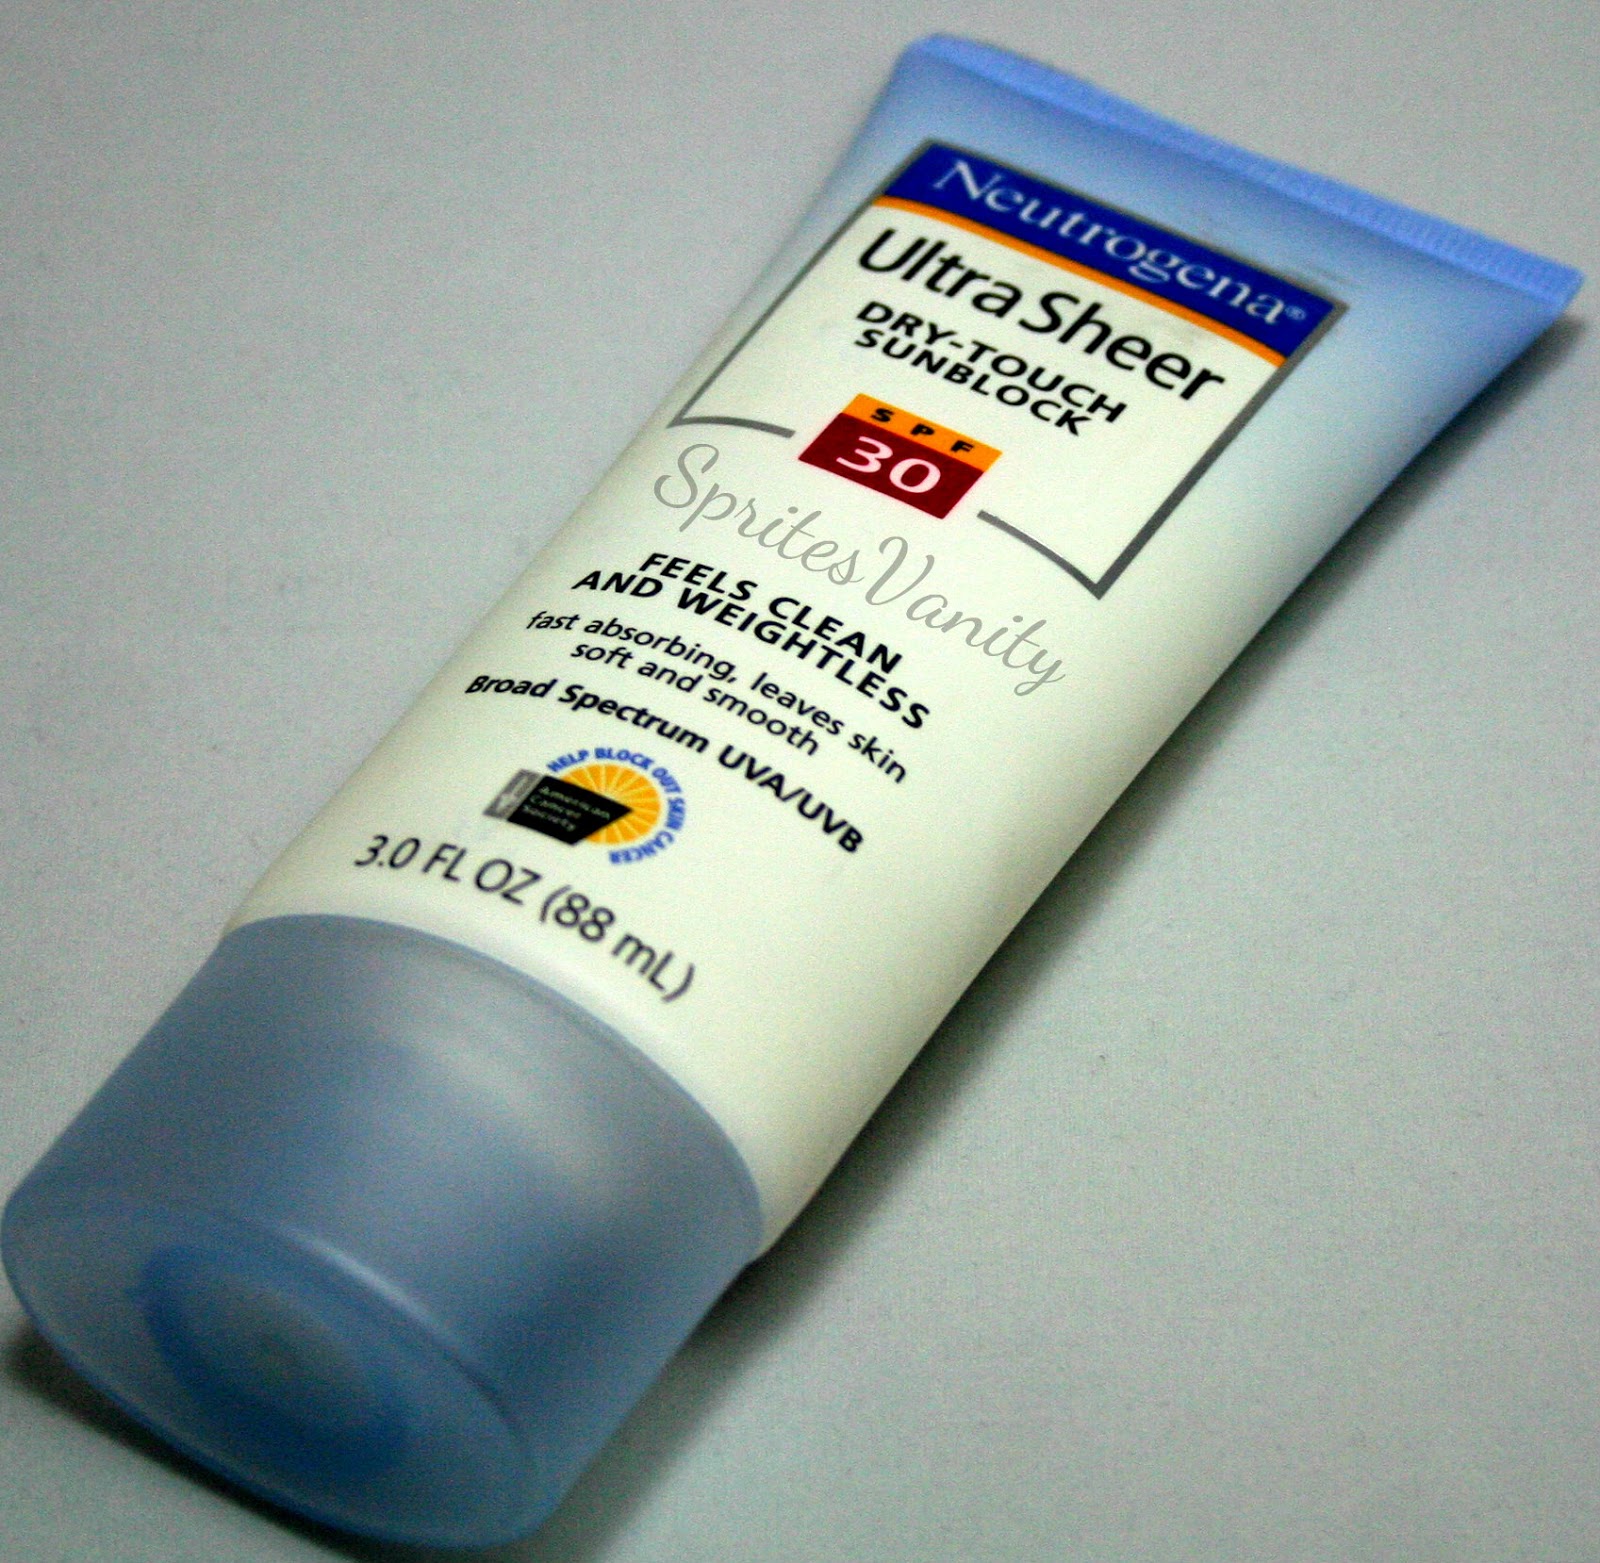
Last spring I discovered this SPF. I was skeptical because we all know the typical feel of a sunblock. It is usually greasy, thick, and shiny. BLECH! That is all fine and dandy if I plan to be swimming, but if I am going to be strolling around, wearing makeup, or even going fresh-faced and bare.... I don't want my face to look like an oil slick and feel as though it is being suffocated by a layer of gloop.
Neutrogena makes several versions of SPF. I believe I originally heard about one that is in a smaller container and you have to shake it up. It has a little beat inside that mixed up the product before application. On that bottle it says something about being good for under makeup. At the time, that one seemed hard to come by. I took a chance purchasing this one, and luckily it worked out fantastic!
With the spring and summer rolling around before we know it (unfortunately! HA, I'm a snow bunny), we'll be busting out these types of products more. However, you all should be using SPF already! :-) Unfortunately, the reality is, most people wait until it is tank top and flip flop weather before they worry about protecting their skin. I highly recommend checking out this particular one. I don't think you'll be disappointed.
Friday, February 1, 2013
Simple Hydrating Light Moisturizer

I have tried so many moisturizers over the years. I am someone who will find something, stick with it for quite some time, and eventually move along to something else that seems like it could fit the bill. I have been using this particular foundation for about a year now, I would say.
I originally started to use it because a dermatologist I had been seeing started me on medicines that were extremely harsh on my skin. We're talking, having my skin feel like acid had been poured all over it and even after cleansing (which burned like none other!) it was hard to apply moisturizer without fanning myself, hoping for relief. I have since found a new doctor! WHEW! Anyway, back then, I was told to use a moisturizer that also contained salicylic acid (NUTS!). I decided, on my own, to go against what this doctor said because it was frying my face off. I went looking for something natural and less harsh. I started by using something in the Burt's Bees line. I can't remember the exact name, but it was for sensitive skin and had cotton extract (?) in it. That was heaven. It was gentle on my skin and didn't burn like the devil when I applied it. Because of the price tag and the small amount of product in the tube, I wanted to try to find something else. I wound up looking at products within the Simple line.
I like that it is light (they do have a thicker, richer formulation as well) and soaks into my skin quickly. It makes my skin feel healthy, not too dry and not too heavy with moisture. I never experience oiliness using it. I have gone through several bottles of this and plan to continue purchasing (at least until something new pops up that I just have to try...haha!).
There isn't an SPF to this moisturizer, though, which could be a downfall for some people. Because of this, I use a separate SPF over it in the day. I will do a post on that product next.
If I am correct, this product started out in the UK and eventually made its way here to the states. This is a relatively new product on our shelves. I, typically, don't have a problem finding it in stores.
I find that this moisturizer doesn't irritate my skin on a day to day basis. Granted, I am not using/taking the same medications from Dr. Skin Destroyer. If I go overboard with topical treatments, like benzoyl peroxide creams, I will have slight irritation from the moisturizer, but I attribute that more to the fact that I went a bit nutso trying to dry up a pimple area. Do I think the Burt's Bees moisturizer would be better for those times? Probably. If that stuff can be soothing to skin that was fire engine red back a year ago, then I think it could soothe slightly over-dried patches. But, if you have normal to sensitive skin I think this moisturizer would work perfect. If you, for some reason, have a doctor like I did who burnt the heck out of your skin, or you have extremely sensitive skin, then I would recommend trying the Burt's Bees moisturizer.
Subscribe to:
Posts (Atom)